How to build a reclaimed stone fire pit
written by Ben Ellis
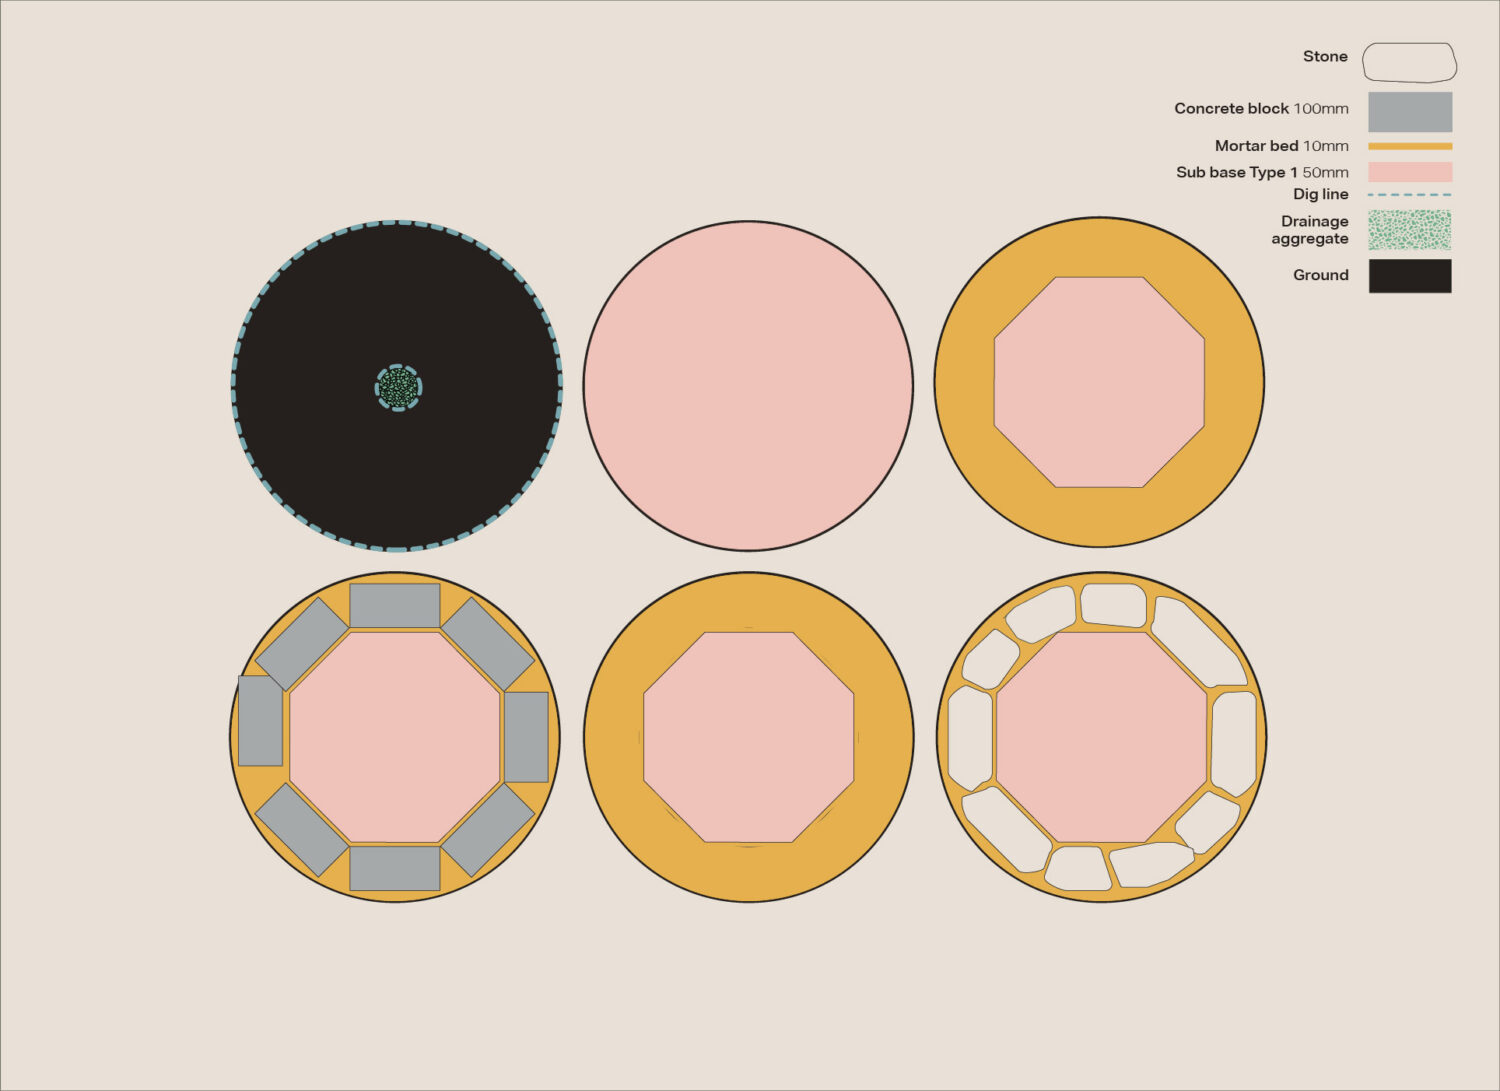
As summer fades into autumn and the nights begin to draw in, it’s the perfect time to enjoy your outdoor space around a cozy fire. We’ve built a fire pit to see the chillier evenings in with. We’ve put together a guide to building a reclaimed stone fire pit to help get you underway with your next project.
We opted for reclaimed walling stone. The irregular shapes and sizes of the stones give the fire pit a lovely naturalistic softness and also make it a great way to get to grips with working with mortar; you don’t need to worry about consistent joint sizes; a must when dealing with regular sized clay bricks.
Equipment
If you’re a keen gardener or DIYer you’ll probably find you already have a lot of the kit required to build the fire pit. An exception may be the tamper but alternatively a sledgehammer can be used as a compacting device, held vertically by the handle and rammed up and down. Also, you may want to hire a concrete mixer for mixing the mortar if you don’t want to do it by hand.
- Setting out equipment (string line, road pin, hammer and spray paint)
- Spade
- Garden fork
- Tape measure
- Spirit level
- Wheelbarrow
- Rake
- Hose or watering can (with watering can rose)
- Brick trowel
- Brick jointer
- Tamper (or sledgehammer)
- PPE: gloves, dust mask, goggles
- Optional: concrete mixer
Materials
Most of the materials needed to build the fire pit will be easy to source at a local builders merchants or a mainstream store such as B&Q or Wickes. A drainage aggregate may be sold as 20mm limestone chippings. This will form a permeable sub base to allow for drainage, more so than the MOT Type 1 aggregate which is non-permeable when compacted. Concrete blocks, cement, sand, plasticiser and gravel/shingle are all easy enough to get hold of.
Which brings us onto the reclaimed stone. Reclaimed stone pieces shouldn’t be too difficult to get your hands on but you may need to order it online or call around local reclamation yards. Whichever stone you use is up to you. We built our fire pit out of York stone but sandstone, granite or Cotswold stone are all viable alternatives. Try searching for reclaimed walling stone to see what is available. Aim for manageable sized pieces rather than boulder-like pieces.
- Reclaimed stone (e.g. York stone, sandstone, granite)
- Drainage aggregate (e.g. Type 3, limestone or granite aggregate)
- Concrete blocks
- Building sand
- Cement
- Plasticiser
- Gravel or shingle
How to build your fire pit
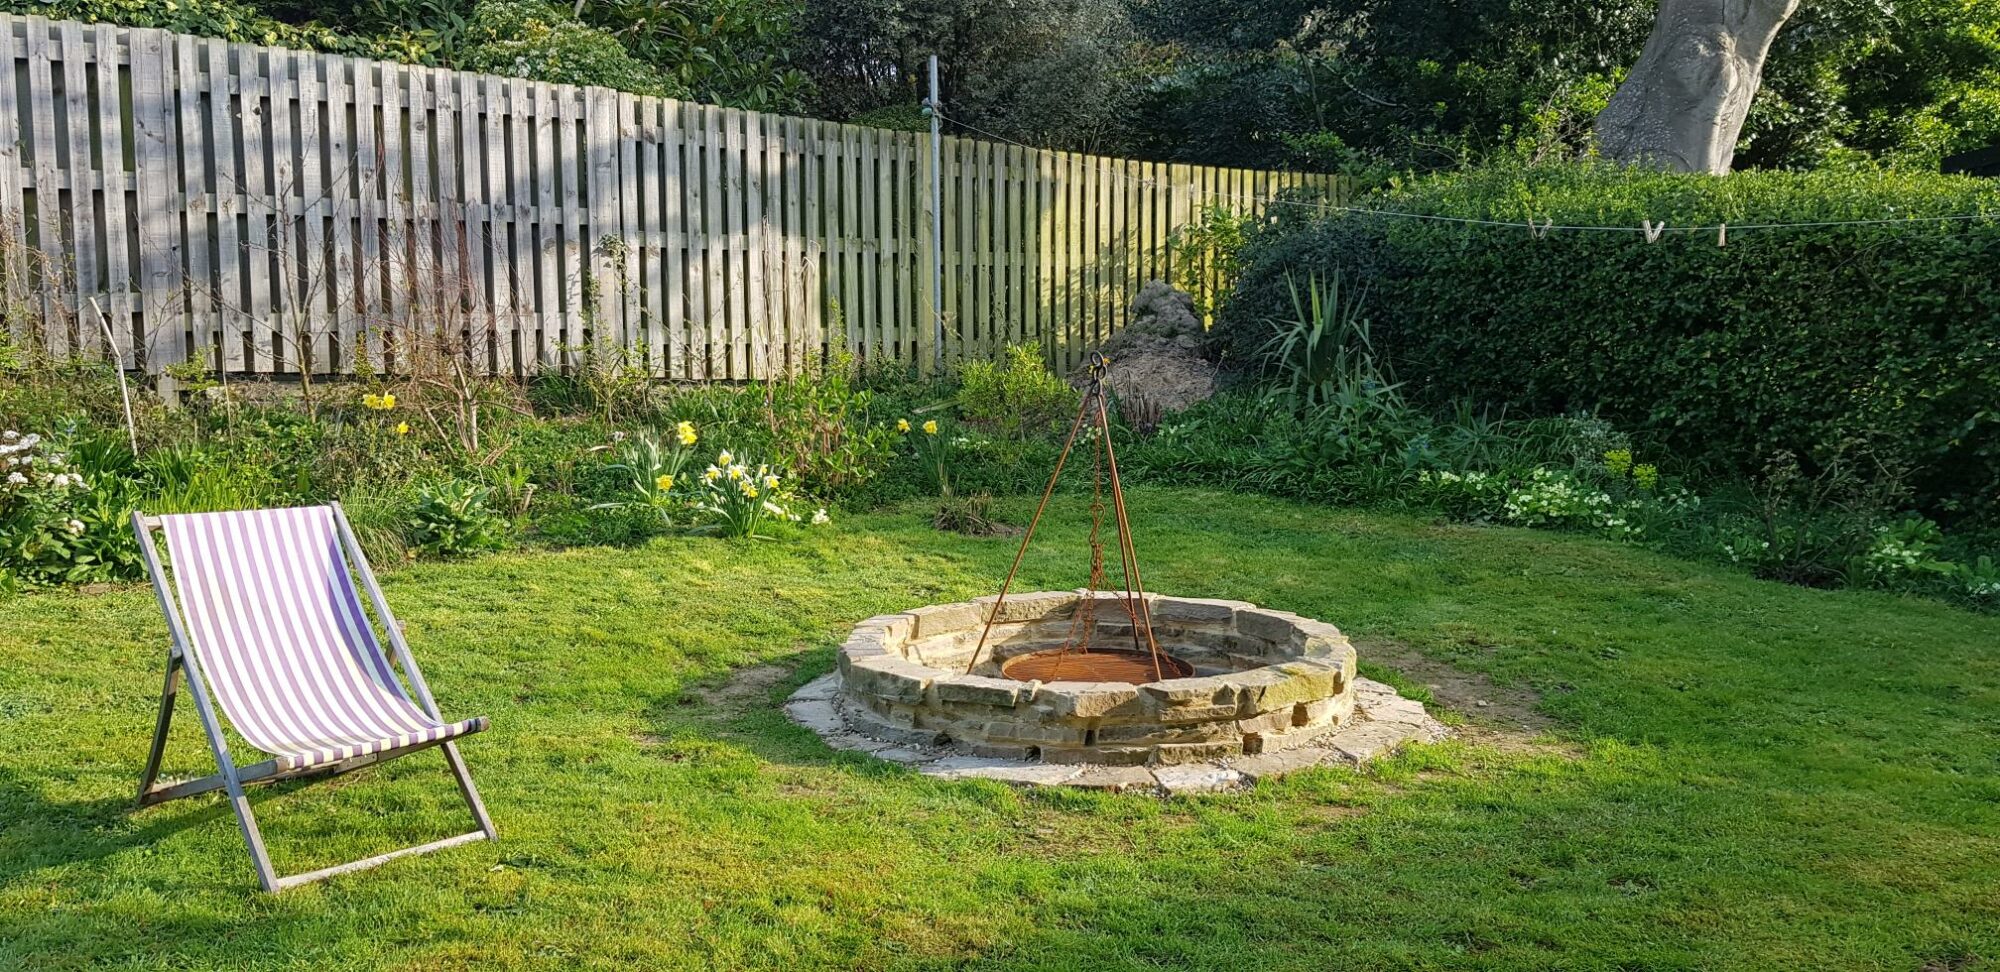
Step 1: Setting out
Start by choosing an area of ground (soil/grass) you would like to build your fire pit on. Then, lay out your concrete blocks in a circle. Mark out the circumference of the fire pit. To do this, place a road pin in the centre of where the fire pit will be, take a string line out from this point with a can of spray paint at the end of it, pull the line tight and spray in a consistent circle to mark out the boundaries along the external faces of the concrete blocks.
Top tip: Can’t get your hands on any setting out equipment? Try marking your fire pit out with a piece of rope laid in a circle. It might just take a bit of measuring and tweaking to get a perfect circle.
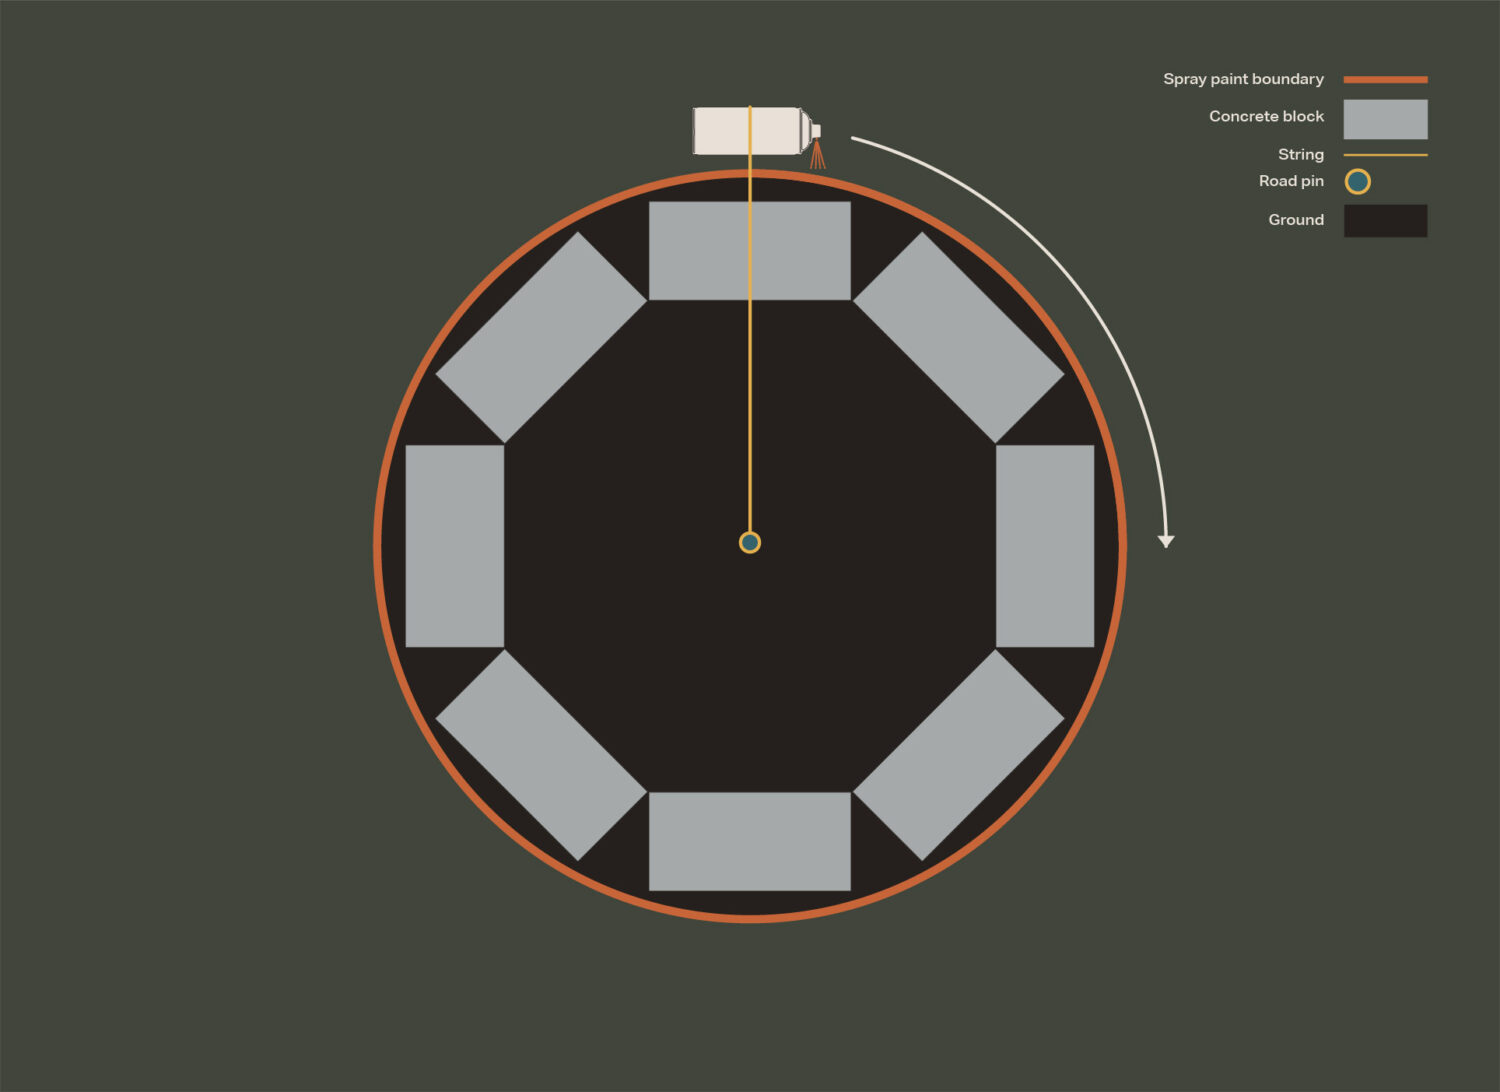
Step 2: Digging out
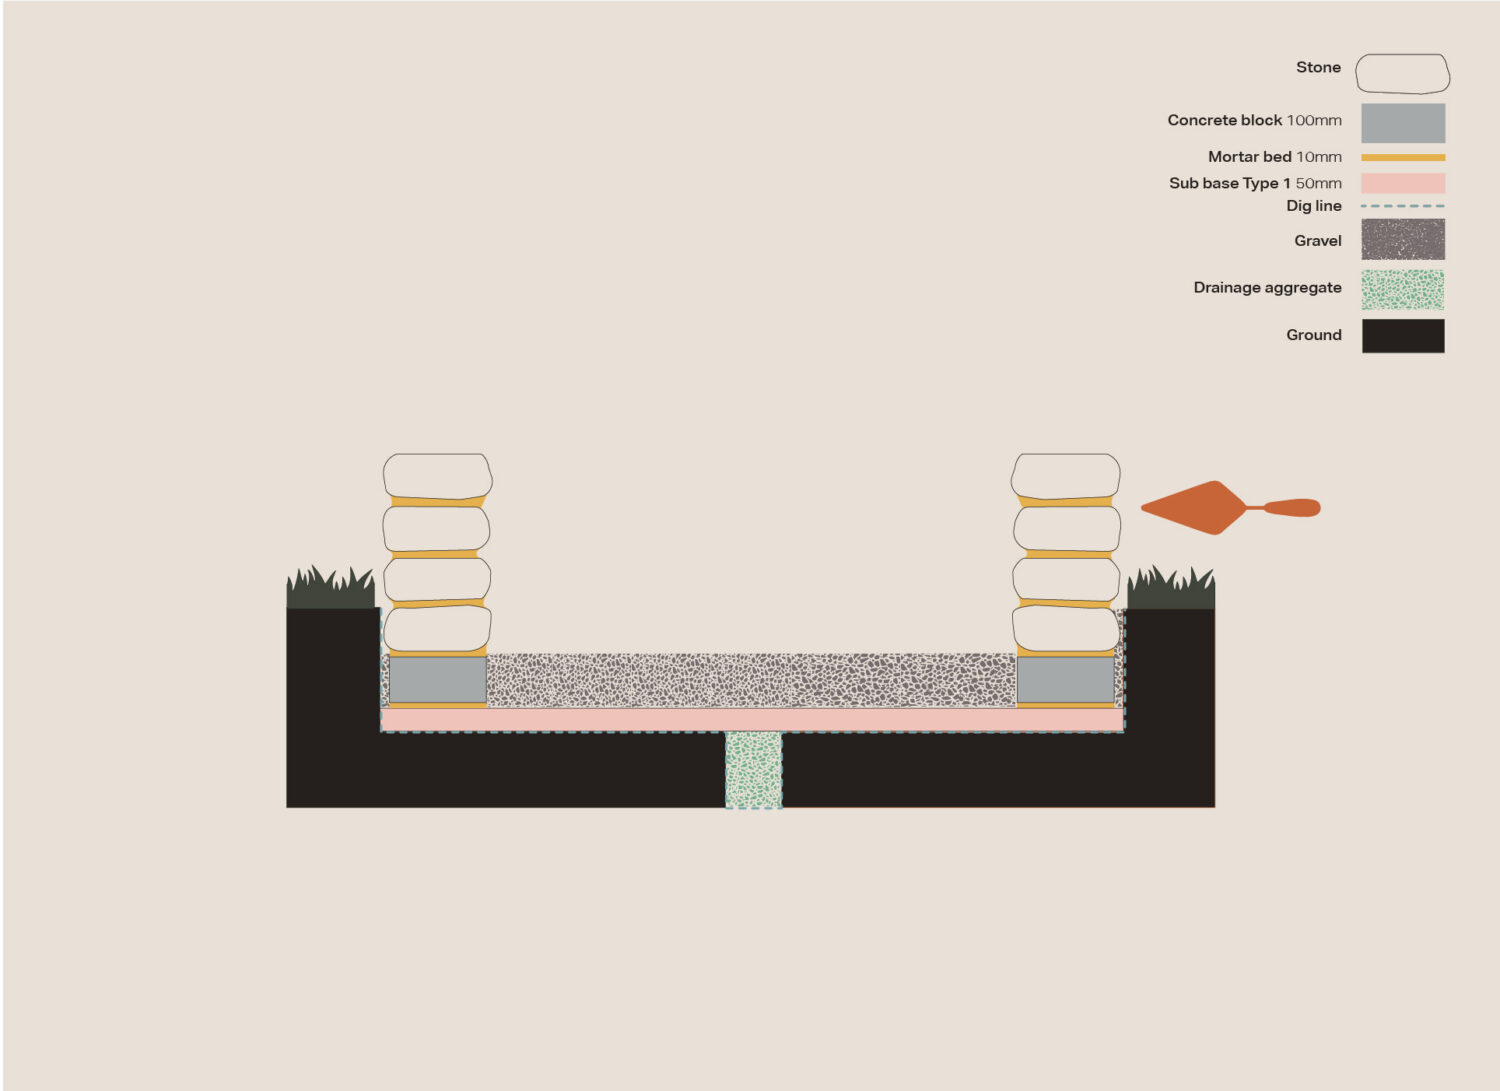
Time to start digging. Dig out the area with a spade. Cut manageable sized chunks of turf and remove with a garden fork. The area needs to be dug to a depth of approximately 270mm to accommodate 50mm of drainage aggregate, a concrete block (100mm), the first course of reclaimed stone and two 10mm mortar beds. Use a spirit level to check the area you have dug is level. Dig a hole in the centre of your circle about 300mm deep and 200mm wide and fill it with gravel or shingle to allow for drainage.
Top tip: Stack the waste turf (grass side down) in an area to decompose into a compost.
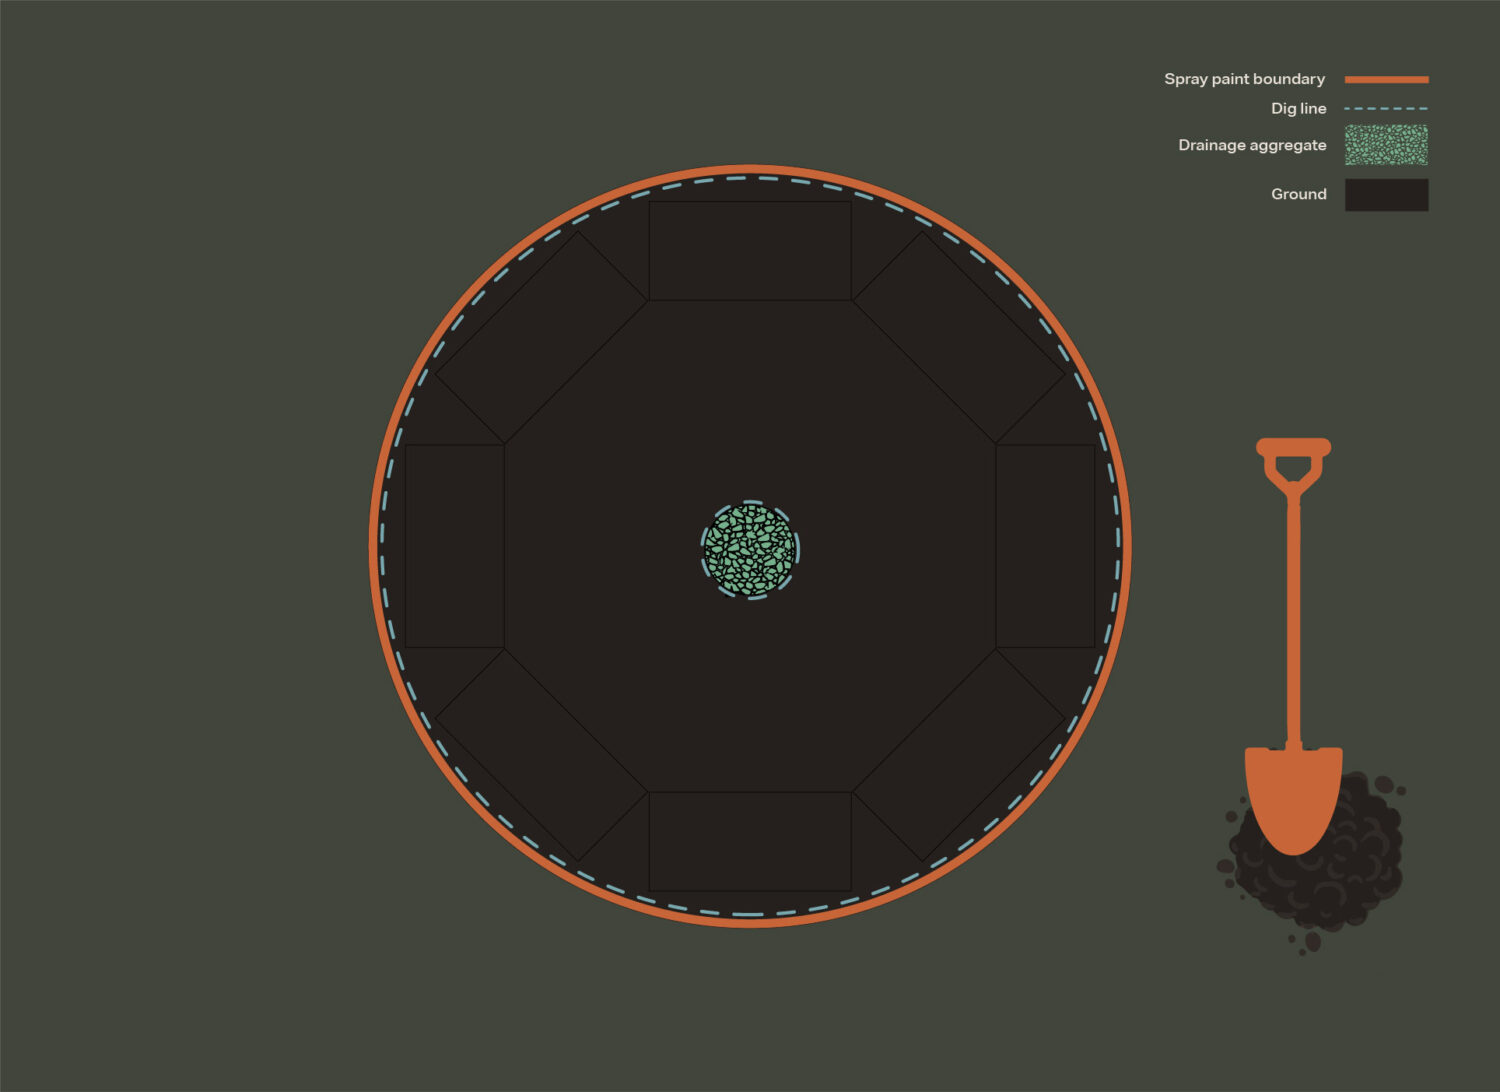
Step 3: Building a sub base
Place your drainage aggregate into the fire pit space, approximately 60mm deep and raked out evenly. Water the aggregate with a hose or watering can (with a watering can rose). It needs to be sufficiently wet to help the sub base bind but not so wet that it becomes water logged. Take your tamper and compact the sub base to 50mm deep. To check you have done this correctly there should be a space of about 220mm between the top of the aggregate and the ground level. If the gap is too big you can always add more aggregate.
Step 4: Mixing mortar
Caution: Always wear gloves, a dust mask and goggles when working with cement.
A sand and cement mortar can easily be mixed by hand. Add a ratio of 4 parts building sand and 1 part cement into a wheelbarrow and mix it together with your spade until the mix is a consistent colour throughout. Once mixed well, hollow out the centre of the mix to create a well to add water to. Pour water into your well. Be careful not to add too much as you can always add more later. You may also want to add a splash of plasticiser at this point to improve the workability of the mortar though this is not essential. Continue to mix for 2-3 minutes adding water as required. Your final mortar mix should not be so wet that it cannot form a stable shape but not so dry that it makes it impossible for the mix to adhere to your stone. Comparing your mix to images of brick laying mortar online is a good place to start if you are new to mixing sand and cement.
Step 5: Laying the concrete blocks
Using a brick trowel, start by laying a mortar bed of about 12mm thickness and wide enough to accommodate a concrete block. This will make the final thickness of the mortar bed 10mm after placing the concrete block. Place the block on the mortar bed and tap down evenly with the back of the trowel handle to level. Repeat the process to create the circle of concrete blocks laid out in Step 1. This will form a footing for the reclaimed stone.
Step 6: Laying the first course of reclaimed stone
Using a brick trowel, start by laying a mortar bed of about 12mm thickness and wide enough to accommodate your first piece of stone. Like the concrete blocks, this will make the final thickness of the mortar bed 10mm after placing the stone. Place the stone on the mortar bed and tap down evenly with the back of the trowel handle. Repeat with the next brick along leaving an average gap of 10mm between the previous brick. Due to the inconsistent shape of the stones a perfect 10mm gap every time will not be achievable; just try to aim for 10mm as much as possible! Repeat the whole process until you have a circle of stones one course high. Of course, the circle won’t be perfect due to the angular nature of the stone but aim for the best fit. Fill the gaps between the stones with mortar and spread it smoothly with the trowel.
Top tip: try laying the stones out dry first to get to grips with the composition.
Step 7: Building up
Start the next course of stones by laying a mortar bed as in step 5. As the top of the first course will not necessarily be level, the mortar bed will not necessarily be 10mm thick. Again, aim for a minimum of 10mm but form a bed which can comfortably balance the stone on top. If the first course is too uneven, use small stones and additional mortar to support the second course. Continue to build on the courses until you reach your desired height. Use a spirit level us you are building up to check the face of the fire pit is roughly level vertically. The final course should be uniformly level across the top.
Top tip: try to leave some gaps in the joints between stones. This will improve airflow for the fire.
Step 8: Finishing up
Use the brick jointer to outline the mortar joints to add definition to your fire pit. Next, take your gravel and spread a layer over the sub base and concrete blocks to cover them up. Leave the mortar a few days to cure sufficiently; lighting a fire immediately can dry it out too quickly causing it to crack.
Top tip: try adding a grill to convert your fire pit to a BBQ.
If you have leftover stone, you could also add a ring of paving around the fire pit. Lay one layer of stone at ground level around the outside of the fire pit wall, mark out and dig down enough to allow for a 50mm bed of type 1 sub base, 10mm mortar and one layer of stone. Fill between the paving stones with gravel.